Creating your template
-
cloud_uploadStep 1: Uploading a document
To get started in Avvoka, you firstly need to upload a document. We have chosen to use a standard NDA as the document for these lessons.
Upon logging in, you will automatically be in the ‘My Documents’ tab but to upload a document you need to be in the ‘Templates’ tab. Simply click the ‘Templates’ button which is next to ‘My Documents’ within the blue banner at the top of the screen.
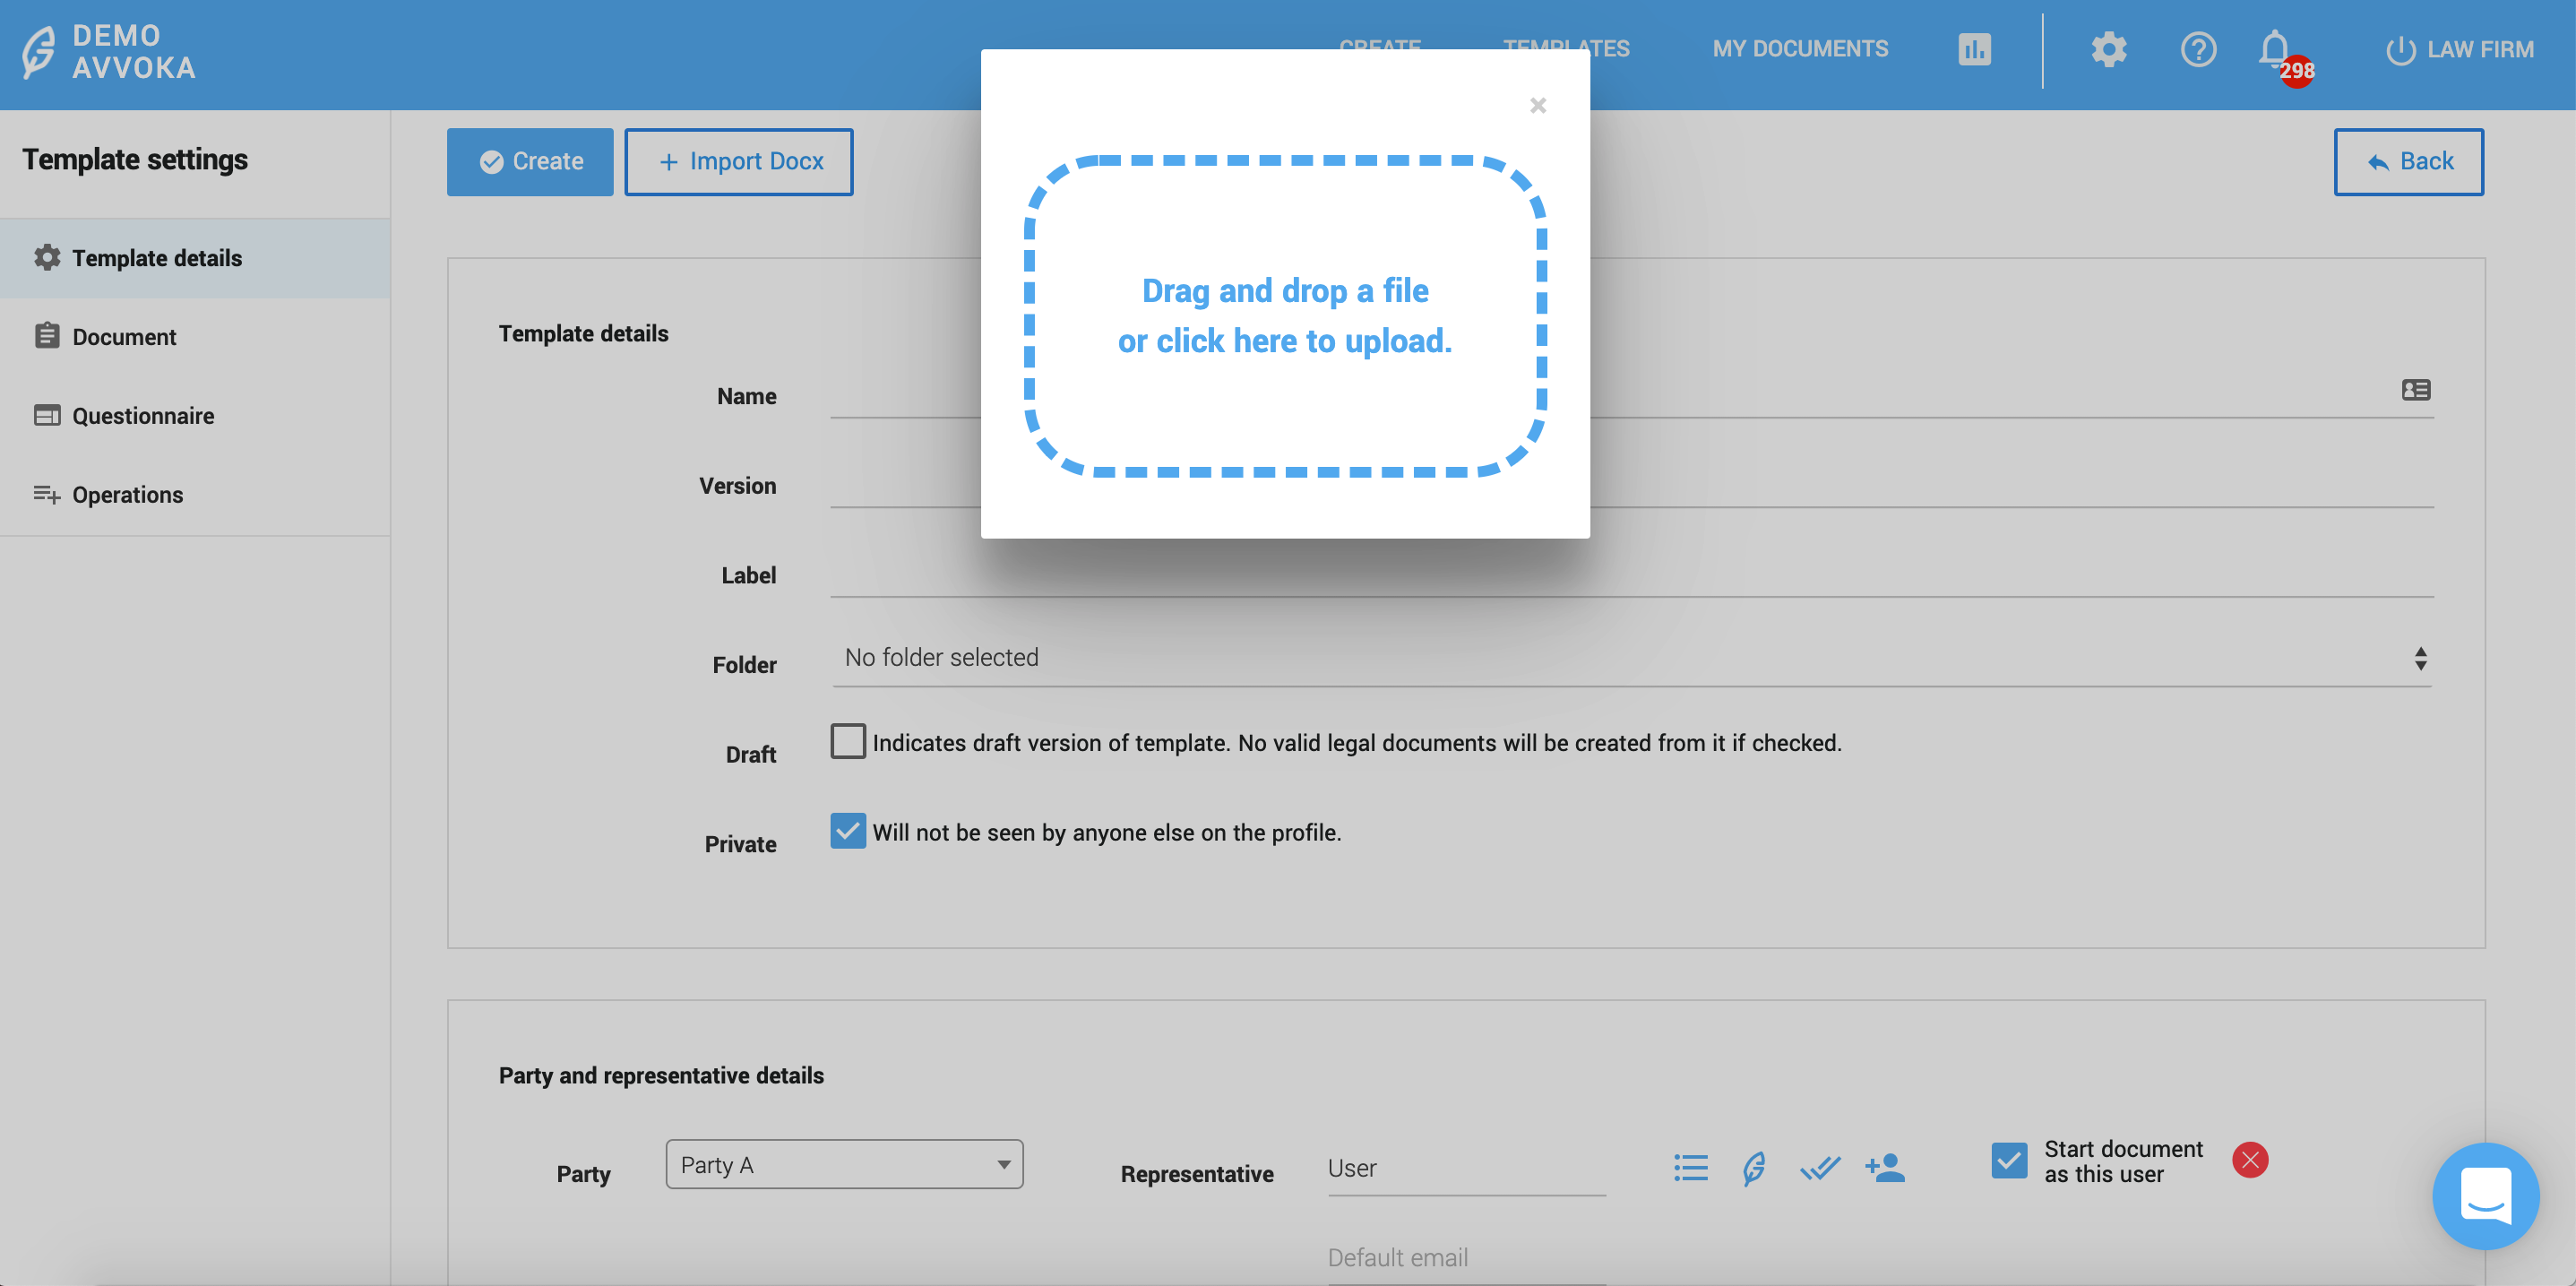
Within ‘Templates’ you need to navigate to the ‘add template’ button which is the plus-sign directly next to the blue ‘Edit’ button. Click on this button and you should be navigated to a page which has ‘Create’ and ‘Import Docx’ at the top.
Click on ‘Import Docx’ and it is here you are able to upload the NDA document. You are able to either drag and drop the NDA into the dashed box or you can click within the dashed box to find the NDA within your documents and upload it that way.
If the NDA has uploaded successfully, the green progress bar will go to 100% . Check your uploaded document is there by clicking into the ‘Document’ tab on the far left-hand side of the page.
-
settingsStep 2: Setting up template details
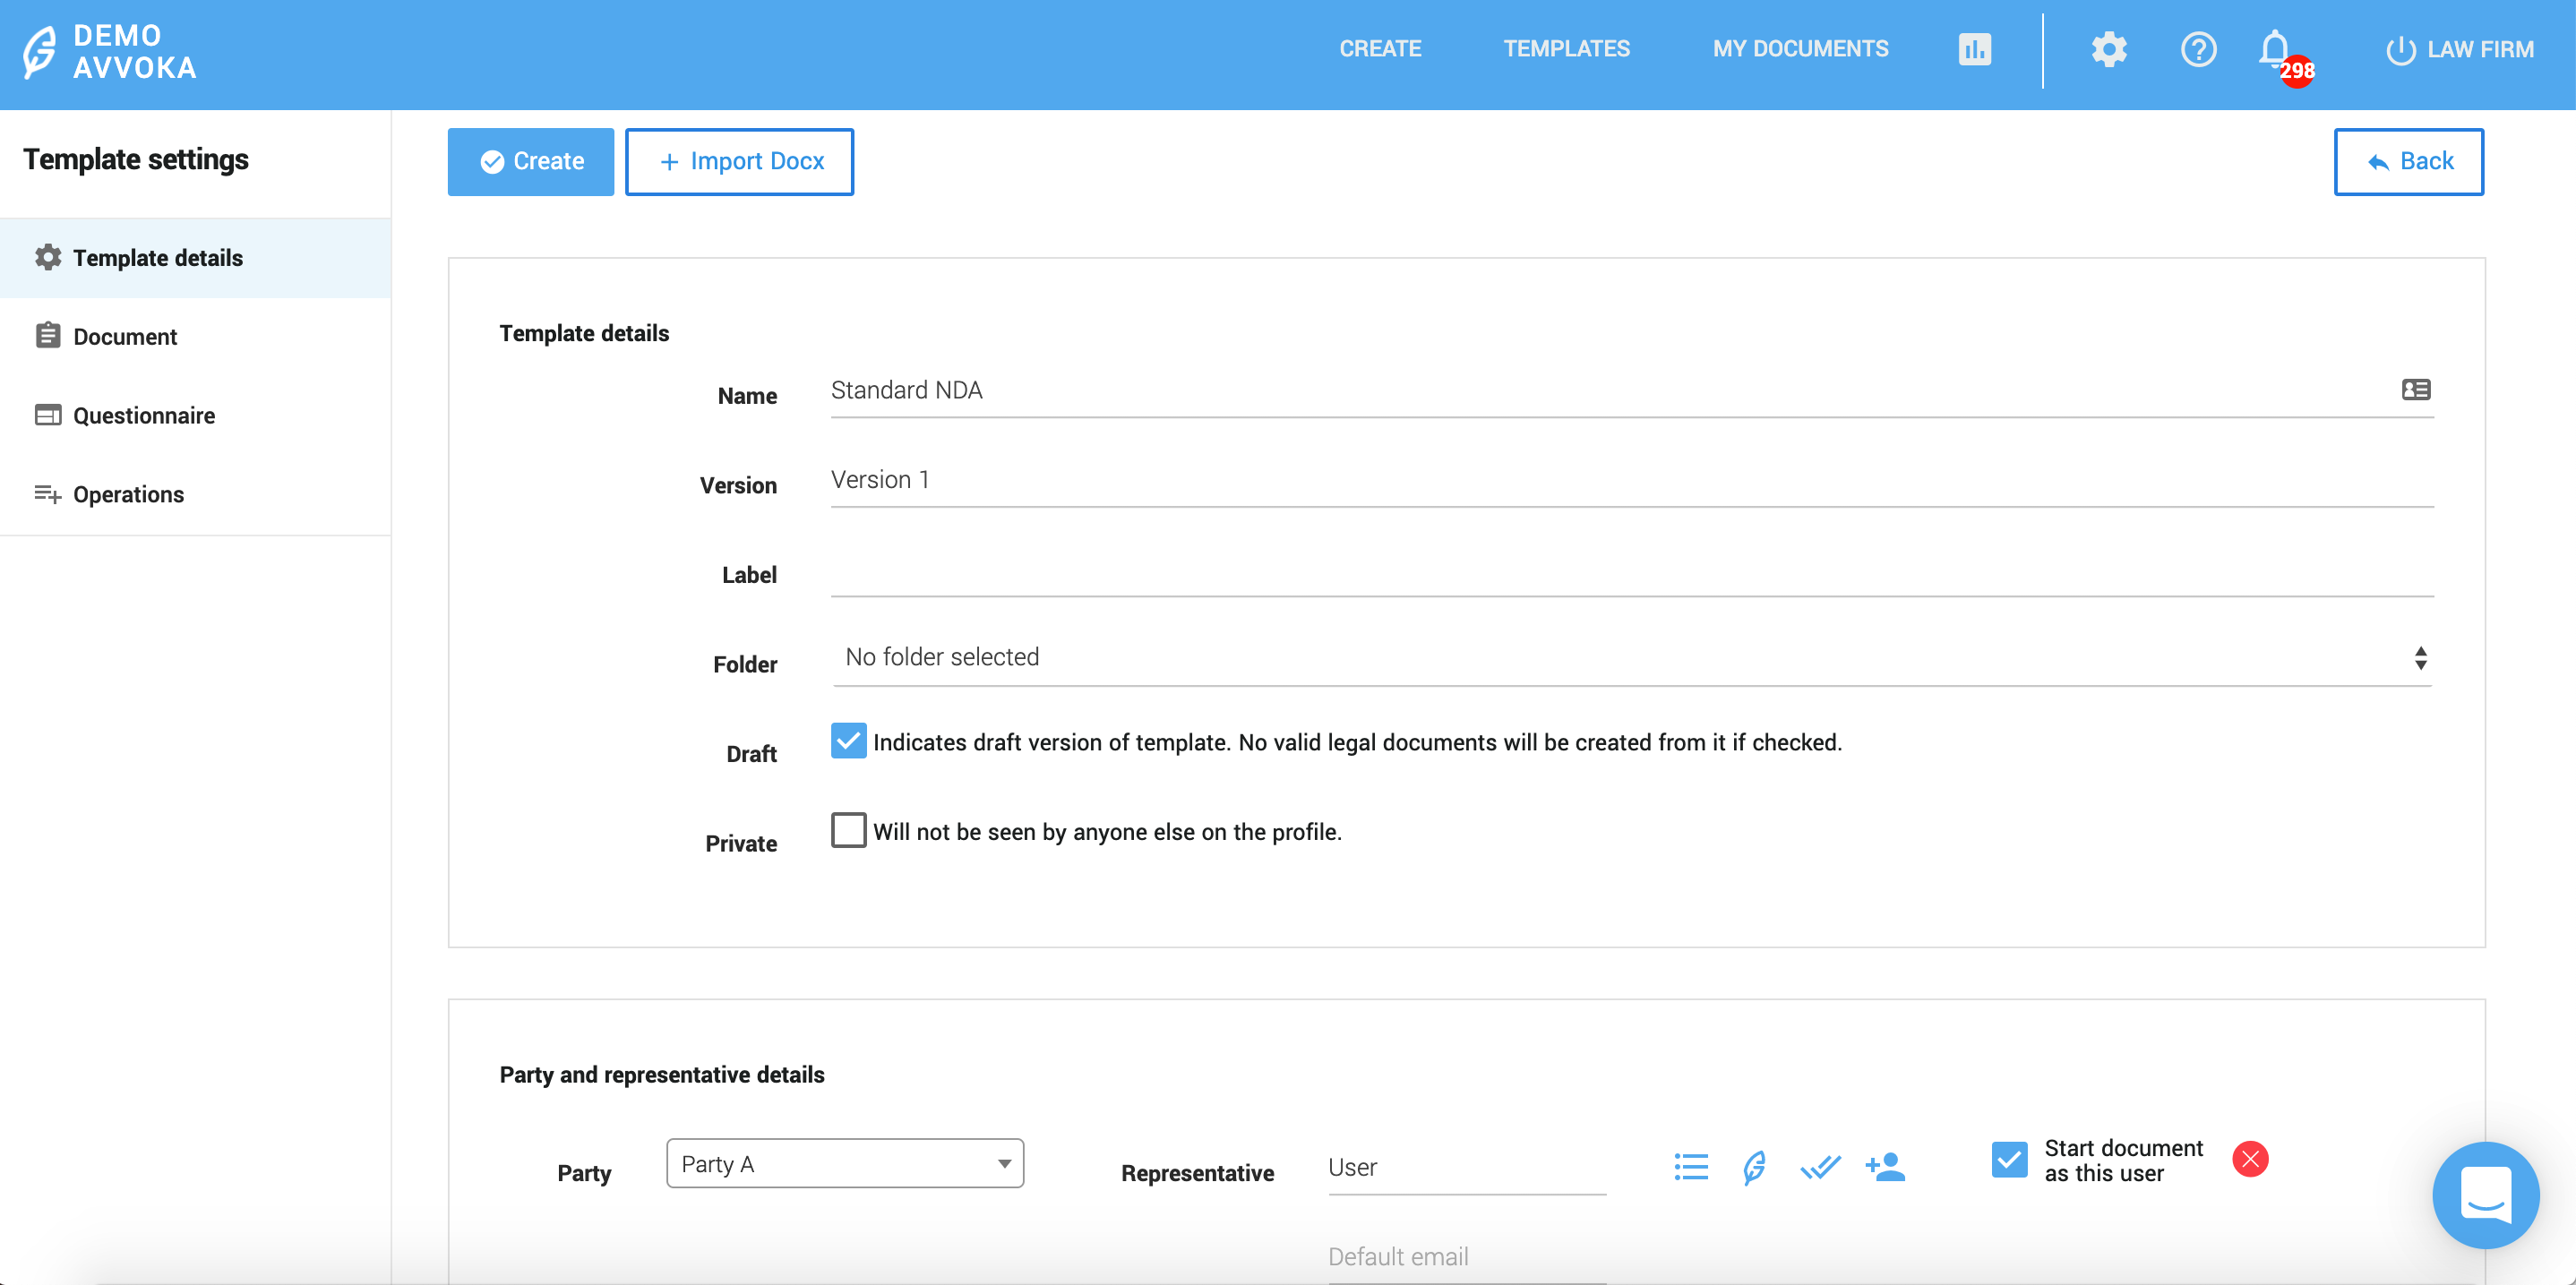
Once you have checked your upload, click back into the ‘Template details’ tab.
Here, you are able to set out the fundamentals of your template.
To begin with, in the ‘template details’ box, you need to give the document a name. On the name line, call the document ‘Standard NDA’.
Beneath that, on the version line, type ‘Version 1’. You can amend this to different version numbers as you see fit as the template progresses during its automation and negotiation phases.
Leave the third ‘label’ line blank for the purposes of this lesson, but this option is there if you would like to provide a label for the type of document which you are automating.
Also within the ‘template details’ box, leave the ‘Private’ box unticked but do tick the ‘Draft’ box as this indicates that the document is a draft version, which won’t be legally binding.
-
person_addStep 3: Setting up Parties
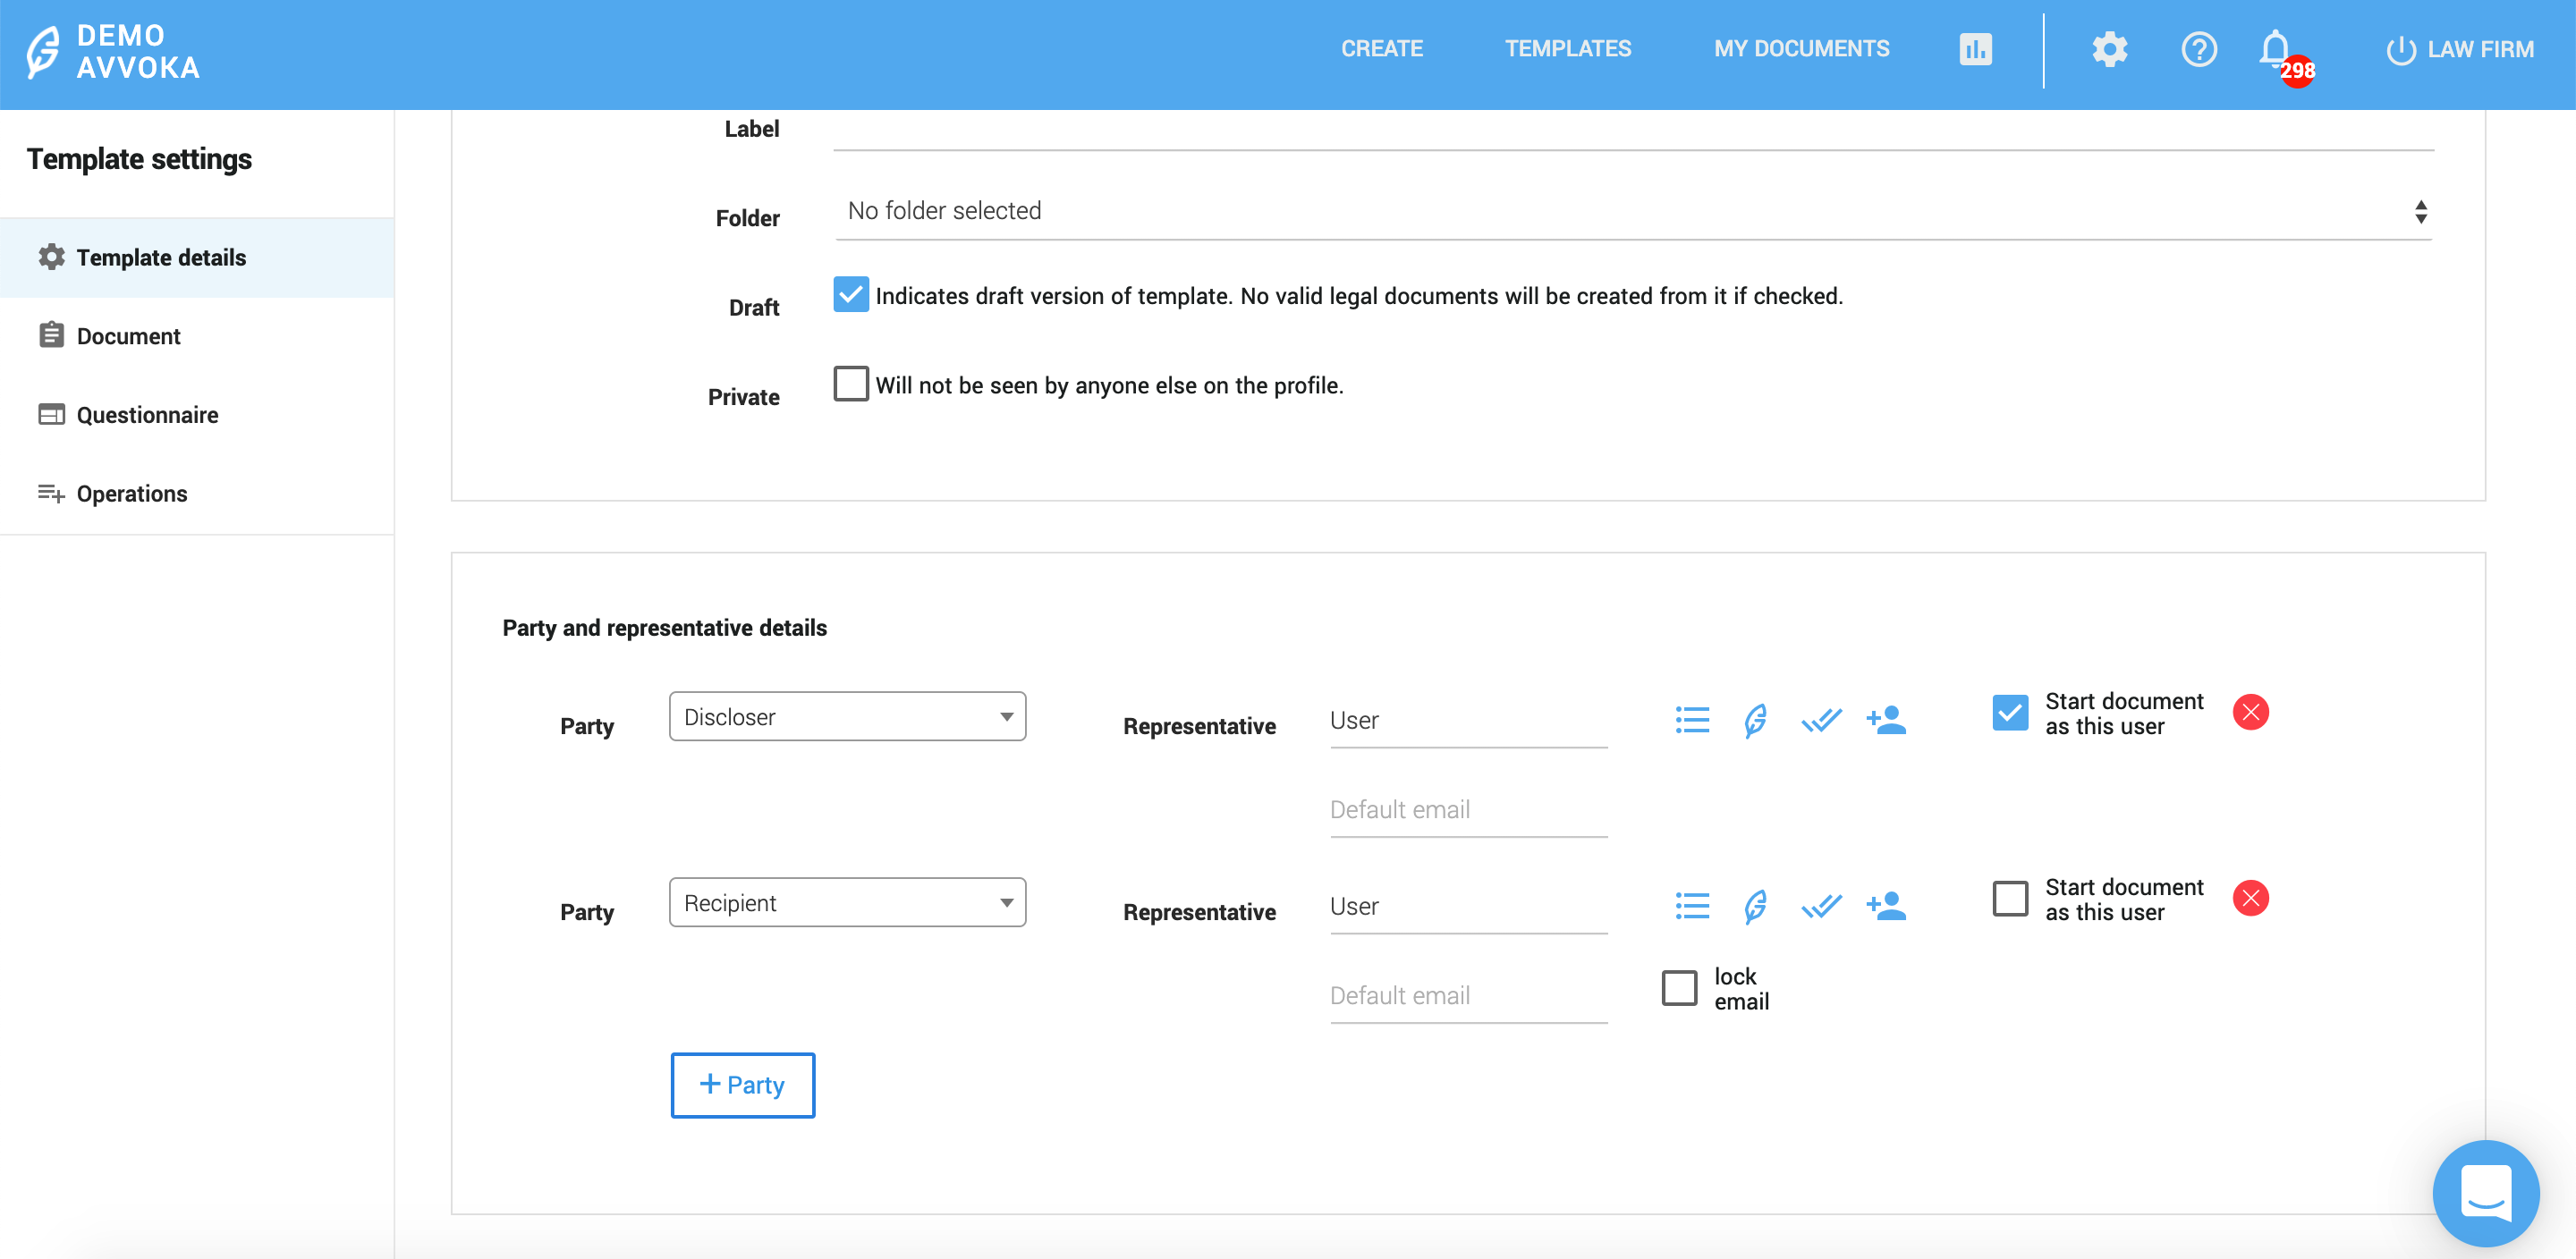
Now that the template has been set up, we can add the details of who the Parties to this document will be. We’ll do this in the ‘Parties and representative details’ box below the ‘template details’ one you just filled out.
This NDA requires there to be two parties. One party is already present as a default so you need to click the ‘+Party’ button to add another party.
Once you have done this, we need to name the two different parties. Where the current label is ‘Party A’, change this so that the party’s name is ‘Discloser’. You will need to type ‘Discloser’ into the textbox and click on the drop-down that has been created to select ‘Discloser’ as your name of choice. Alternatively, you can press ‘Enter’ when you are happy with the name given.
Do the same for ‘Party B’, except this time name the party ‘Recipient’.
Next, we need to state the nature of each party in the Representative box. Type ‘User’ for both the Discloser and the Recipient.
-
editStep 4: Setting up Parties’ rights
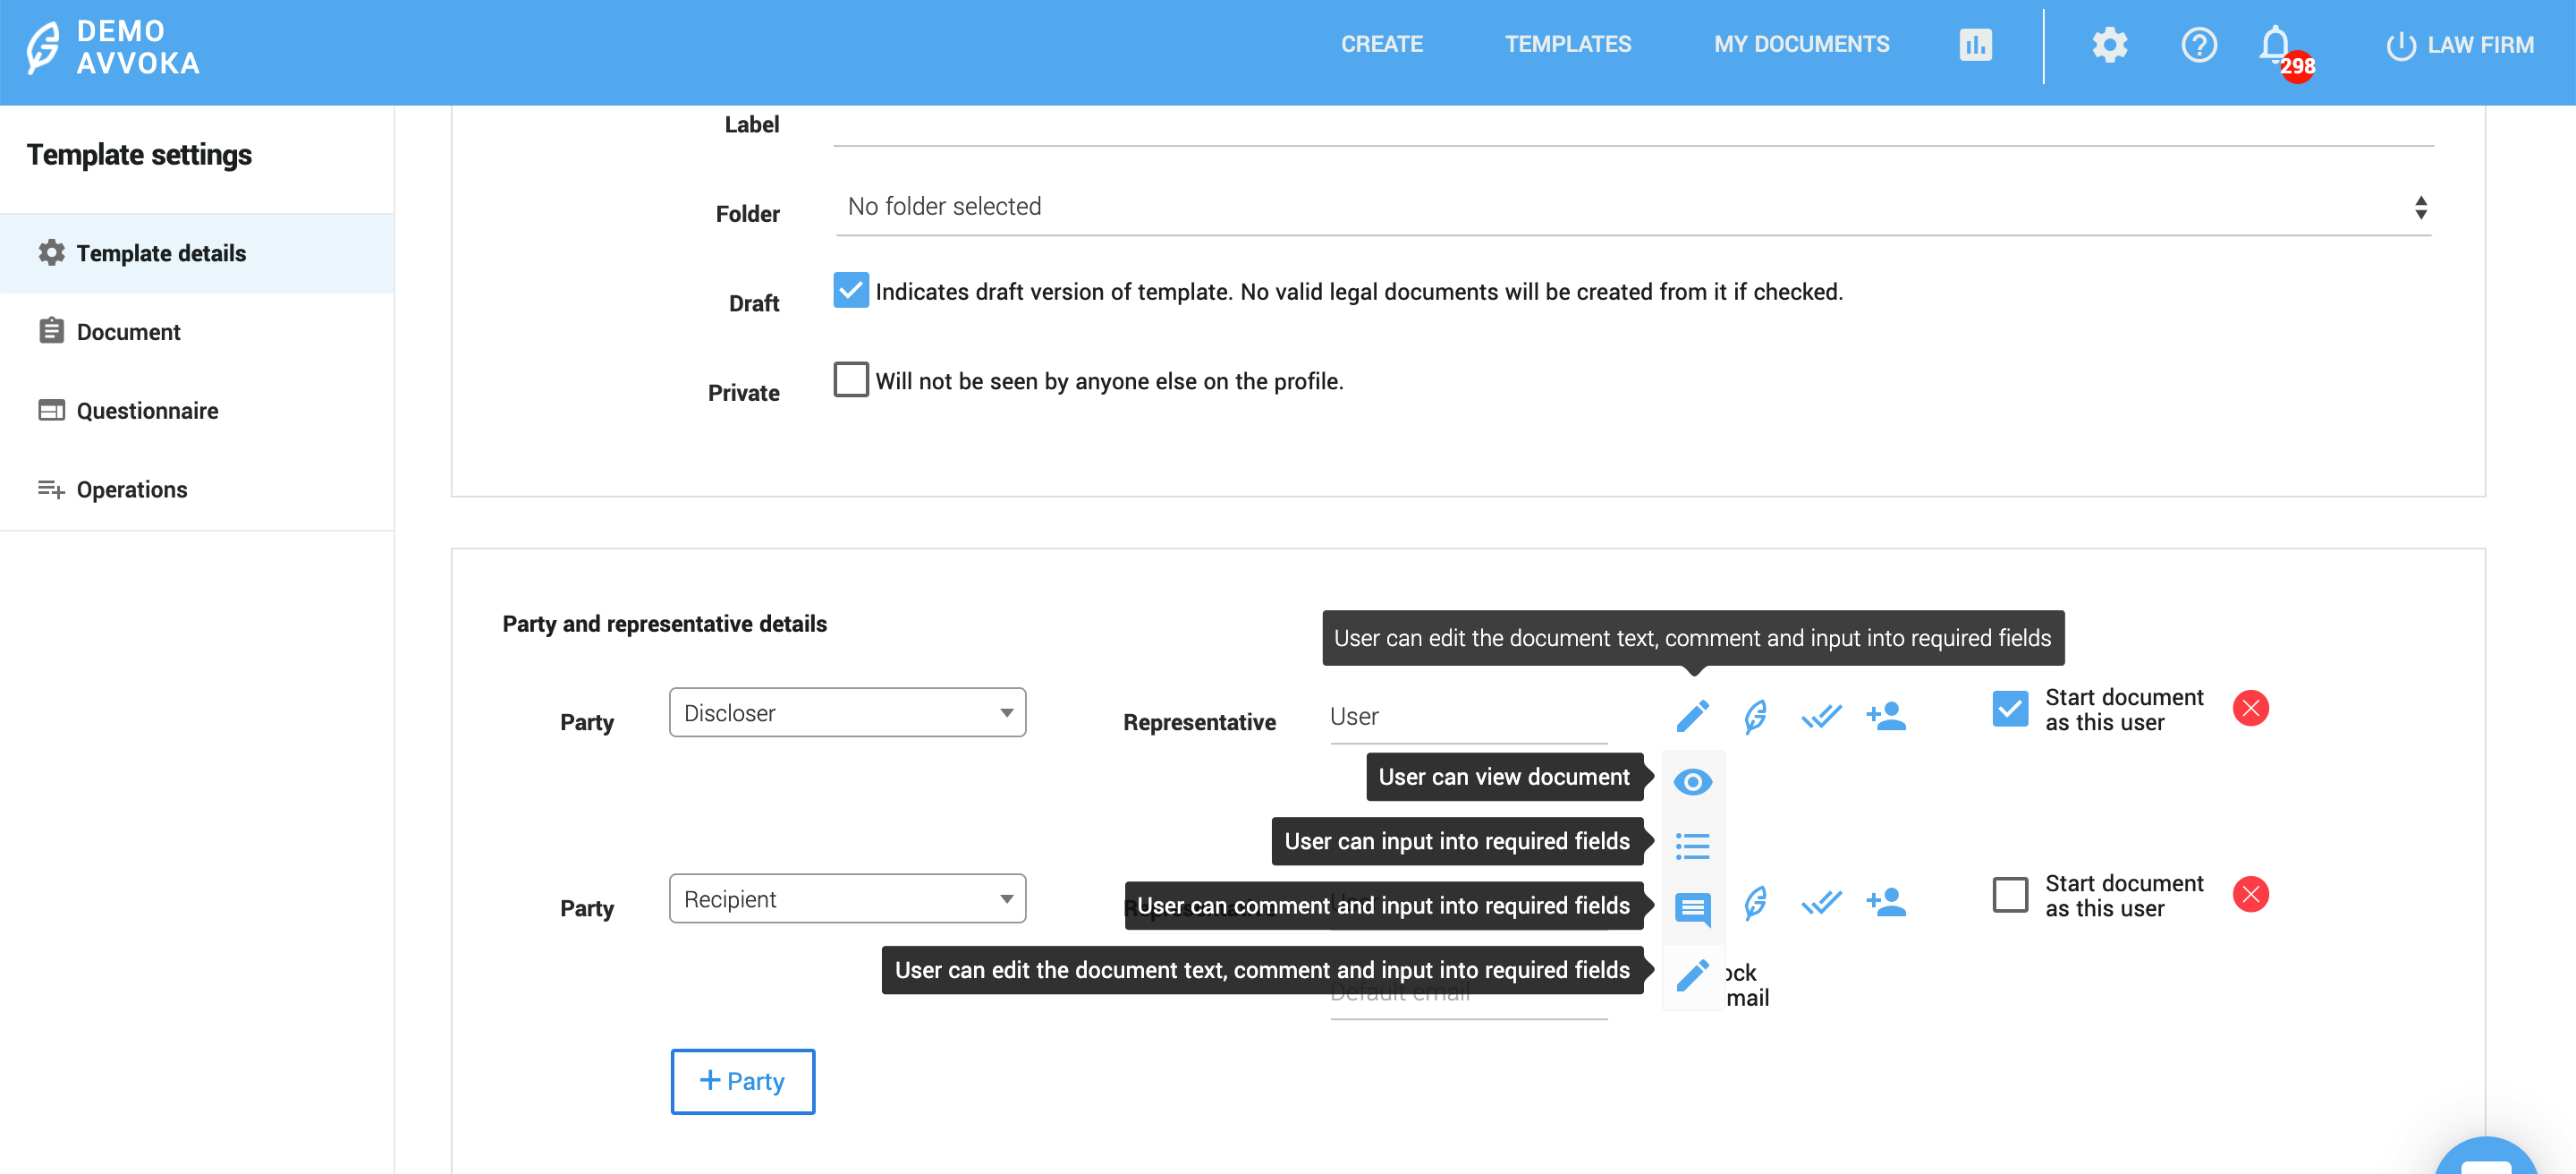
After setting up the Parties to the document we need to make sure that they will have the correct rights. We’ll do this in the “Parties and representative details” box too.
To the right of the Party and Representative boxes, you will see various blue icons and they each refer to different user rights. You can hover over each of these icons and select the user rights you wish to attribute for each party.
The icon on the far left relates to editing rights and its default is ‘user can input into required fields’. For both parties, please hover over the editing rights icon and select the ‘user can edit the document text, comment and input into required fields’ which is the option which looks like a pen at the bottom of the editing rights options list.
The next icon across from the left relates to signature rights. The default for this is ‘user can sign’ which is what we want for both of the parties within this NDA, so this does not need to be changed. However, please do note the various other options that can be selected for the signature rights.
The next icon across from the left relates to send and accept/reject rights, essentially whether or not a party is able to send out the document and accept and reject the changes that have been made to it in a live negotiation phase. The default for this is ‘user can send document and accept/reject their team’s edits’, which, again, is what we want for both of the parties to the NDA so this can be left unchanged.
The final icon across, situated on the far right, is the adding users icon. The default for this is ‘user can add users to their own party’ which is the user right we want for both parties in the NDA, so this too is to remain unchanged. Please do note the other two options available for this selection option.
Lastly, you will note the tick box which asks us to select which of the two parties we want to begin the document as. For this NDA, select the ‘Discloser’ as the party to start the document.
-
saveStep 5: Saving our template

To save our document, we need to create it. go back to the top of the page where this time, instead of the Docx button, we need to click the ‘Create’ button to generate and save the document into Avvoka before we go about templating.
And that’s it – you have officially created your first document in Avvoka and it is now ready to be automated!